

How to Fix a Thetford PP C2 C200, C250 Toilet Flush? Step-by-Step Guide
Thetford chemical toilets are one of the most popular solutions in travel trailers and motorhomes. Unfortunately, after a few seasons, they may stop working—most often, the water pump fails.
Why Might a Thetford PP C2 Flush Stop Working?
Fortunately, in most cases, it is a minor fault that can be fixed independently, without the need to send the toilet for service.
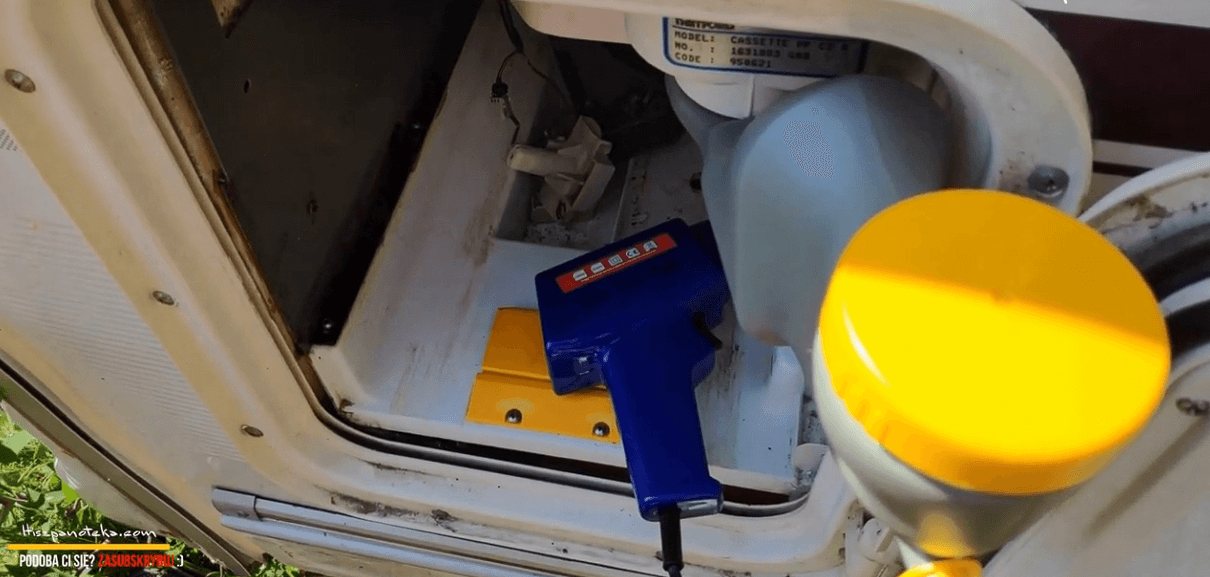
In our case, the model concerned was Thetford PP C2installed in the trailer LunarSymptom: the flush stopped working, even though the switches and fuses were operational.
Most Common Causes of Thetford WC Flush Failure
Desoldered or Broken Wire
The most common reason for the pump lacking power is a desoldered wire near the switch. It is enough to re-solder it, remembering that the connection must be sealed and protected against moisture (preferably using heat-shrink tubing or IP68 waterproof connectors).Damaged or Blocked Pump
Thetford submersible pumps often get clogged with limescale or sediment from the water. Before replacing it with a new one, try gently cleaning it—for example, by flushing it with warm water and vinegar. If the pump doesn't start, it's worth tapping it lightly—sometimes the impeller "unsticks" after a season, and the device comes back to life.Contamination of the Flush Tank
Limescale and algae accumulate in the tank, especially if the toilet was used with water from uncertain sources. Regular cleaning and flushing of the tank (e.g., once at the end of the season) significantly extends the pump's lifespan.Unprofessional Previous Repairs
You can often find makeshift cable connections in used trailers—twisted wires wrapped in insulating tape and thrown into the water tank. This is a simple path to a short circuit or corrosion. It is always worth replacing such connections with solid and waterproof ones.
How to Disassemble and Diagnose a Thetford PP C2 Flush
Unscrew the five screws —four visible on the sides and one hidden deep in the rear part of the casing (this is a common issue that blocks the entire disassembly).
Gently remove the top cover. If the plastic resists, do not pull forcefully—loosen the components one by one to avoid damaging the clips.
Checking the Pump's Power Supply and Connections Step-by-Step
Disconnect the power cables from the switch and the pump.
Check with a multimeter whether voltage is reaching it. If power appears at the switch but not at the pump, the wire is broken or loose.
After repairing the wires, run the pump "directly" (by connecting it straight to the power supply) to check its functionality.
How to secure electrical connections in a camping toilet
All wires in the wet area must be resistant to moisture and contact with liquid.
It is recommended to use:
IP67–IP68 waterproof connectors,
heat-shrink tubing with adhesive,
silicone seals,
waterproof casings for connections.
Do not use ordinary insulating tape—it quickly soaks up water and stops insulating.
Cleaning and Maintenance After Repair
After the repair is complete, it is worth:
flushing the tank with warm water and a bit of vinegar,
cleaning the pump's tubes and inlet filter,
leaving the tank open to dry completely.
Regular cleaning (once every few months) will prevent the formation of limescale and mold, and the flush will serve for many more years.
How to Avoid Similar Failures in the Future?
After the season ends, empty the flush tank and rinse it with clean water.
Nie zostawiaj pompki zanurzonej w wodzie na zimę — wilgoć uszkadza styki.
Check the wires and connections once a year.
If the flush works irregularly, reacts with a delay, or "hums," it is a signal that it is time for cleaning.
Repairing a Thetford PP C2 flush is simpler than it seems in most cases.
Basic technical knowledge, a soldering iron, and a little patience are all that is needed.
The most common problems result from loose cables, a dirty pump, or sediment in the tank—and not from a major failure.
However, if the pump still doesn't work after cleaning, it's worth replacing it with a new one—replacements are available starting from approx. PLN 80–120.
MOST FREQUENTLY ASKED QUESTIONS
Silence after pressing the button – no 12V power (fuse, switch, wires, ground) or the pump is mechanically "dead."
A humming sound is heard, but no water flows – impeller blocked by limescale, airlock in the system, clogged filter/tap, crushed hose, or low water level.
It only works "directly" – a problem in the control circuit: switch, wires, connectors, contact corrosion, or ground.
It works intermittently – loose connectors, flooded/oxidized connections, or the pump is failing.
Diagnosis in 5 minutes: multimeter → check if $\approx 12-13.8$ V appears on the pump wires after pressing the button. If there is voltage but no water, the pump/water system is at fault. If there is no voltage, look on the power supply/control side.
Depending on the conversion/build-out: in the fuse cupboard of the caravan/motorhome, in the panel/toilet, or on the pump wire as an in-line fuse.
Typically a blade fuse of $3-5$ A for $12$ V pumps (always confirm in the manual for your specific model and build-out installation).
If the fuse blows again: measure the pump's current draw (usually about $1-2$ A). A higher reading indicates seizing/limescale buildup or a short circuit in the wiring harness.
Water level in the tank and the screen/filter at the intake – clean them.
Bends/kinks in the hoses – straighten them, check the flow.
Descaling the impeller: remove the pump, submerge it in a $5-10\%$ citric acid solution for $30-60$ minutes, then rinse.
Bleeding the system: fill the tank to the brim, press the flush button several times, gently squeeze the hoses near the pump.
Direct test: apply $+12$ V (via a $5$ A fuse) directly to the pump.
It works directly $\to$ fault lies with the control/connections.
It does not work $\to$ replace the pump.
Descaling: fill the system with a $5-10\%$ citric acid solution or an RV toilet/system preparation (chlorine-free!). Run a few flushing cycles, leave for $1-2$ hours, then rinse with clean water.
Bleeding: fill the tank completely, run the flush several times; gently move the suction hose near the pump. Avoid leaky connectors – they will suck in air.
In many models, submersible $12$ V pumps with similar parameters (flow rate/lift) are used. Not every C2 pump will be plug-and-play for the C200/C250.
Choose based on: $12$ V voltage, flow rate (l/min), connector diameter, connection type, and wire polarity (usually brown/red = $+12$ V, blue/black = ground – check your setup!).
Good practice: use waterproof connectors (IP67) and adhesive-lined heat-shrink tubing.
ools: screwdrivers, pliers, multimeter, IP67 waterproof connectors, adhesive-lined heat-shrink tubing, clamps/ties.
Procedure:
Disconnect $12$ V. Empty and remove the water tank.
Disassemble the access cover/housing (there is often a hidden screw/clip).
Remove the pump, noting the wire polarity and flow direction.
Crimp/solder the new connections, secure with adhesive-lined heat-shrink tubing.
Reassemble, fill, check for leaks, and perform a quick operation test.
In older C2/C200 models, some screws are often deeply concealed (e.g., in sleeves, under caps). There may also be latches/pins near the lever guard.
Rule: first locate all fasteners (flashlight, mirror), do not yank. If the plastic "turns white," stop — there is a risk of cracking.
Disconnect the cassette before starting work. Be careful with seals and guides.
Switch: continuity measurement / test under load – it can "conduct" when idle but fails under current.
Ground: the ground wire to a solid point; clean, preserve with dielectric grease.
Connectors/grommets: look for green residue, looseness; clean with contact cleaner, replace corroded connectors.
In-line fuse (if present) and the wire to the panel – check for voltage drops during operation.
Every $4-6$ weeks with regular use; mandatory after a break/winterizing.
Safe: citric acid, chlorine- and bleach-free RV preparations, gentle water system cleaners.
Avoid: chlorine/bleach/lye, strong solvents – they destroy seals and plastics. Rinse the system thoroughly after cleaning.
Empty and rinse the tank, blow out the hoses (manual pump/low-pressure compressor).
Use RV winterizing fluid for systems (propylene glycol-based, non-toxic), not automotive fluid!
Leave valves/taps slightly open so that pressure does not build up. The battery should be charged and disconnected.
In spring: flush the system, quick descaling, and flush test.
Most Common Searches: Thetford C2/C200/C250 Flush Repair, Thetford Toilet Pump Not Working, How to Fix Thetford C2 Flush Pump, RV Cassette Toilet Repair Guide, Motorhome Toilet Pump Replacement, Thetford C2 Pump Troubleshooting, Caravan Toilet Flush Pump Fix, Thetford C2 Electrical Repair, Chemical Toilet Maintenance Tips, Caravanning WC Repair Tutorial